Control the humidity in the vegetable crisper drawers of your Samsung refrigerator

The crisper drawers in many Samsung refrigerators feature a Humidity Control setting, designed to preserve the freshness of fruits and vegetables and prevent them from spoiling prematurely. Whether you’re storing leafy greens or crisp fruits, the adjustable settings allow for optimal storage conditions based on the specific needs of different produce types.
Note: The provided information refers to refrigerators sold in Canada.
High humidity
- For leafy-green vegetables and other items prone to wilting or moisture loss, a high humidity setting is recommended. This setting is ideal for produce typically stored under water spritzers at supermarkets.
- Examples include broccoli, Brussels sprouts, lettuce, cucumbers, peppers, carrots, strawberries, and herbs.
Low humidity
- Fruits and vegetables that are less sensitive to moisture loss should be stored at a low humidity setting. This helps in preventing them from becoming too moist and spoiling.
- Examples include apples, pears, mangoes, papayas, cantaloupes, and avocados.
Adjusting the humidity level is as simple as moving a mechanical slider left or right to select your desired setting. This adjustment can be made quickly and the current setting is easily visible, ensuring that your produce is stored under optimal conditions.
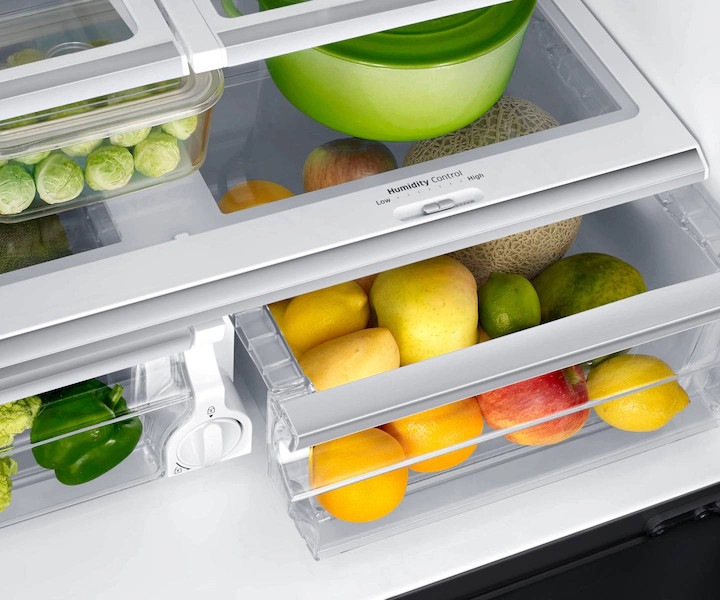
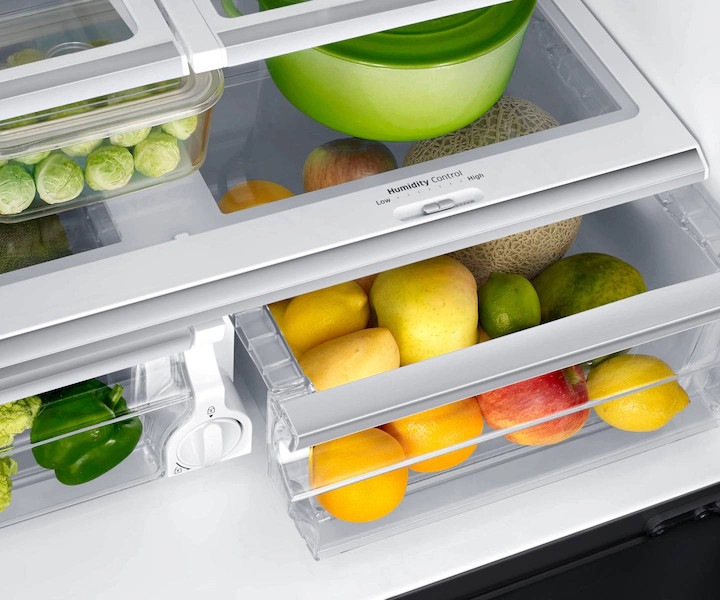
- Balancing act: If you find yourself frequently adjusting the humidity settings based on the types of produce you purchase, consider using one drawer for high humidity and another for low humidity to streamline the process.
- Maintenance: Regularly cleaning the crisper drawers and checking for any blocked vents can help maintain the effectiveness of your humidity controls.
- Monitoring: Keep an eye on your produce. If you notice items spoiling prematurely or not maintaining freshness as expected, tweaking the humidity settings might help.
By managing the humidity settings in your Samsung refrigerator's crisper drawers, you can extend the shelf life of your fruits and vegetables, reducing waste and maintaining nutritional quality.
Before removing a crisper drawer, remove the door bins first. This helps provide enough clearance and reduces the risk of damaging the drawer when taking it out.
The door bins include a marked line to make removing and reinstalling them easier. To remove a bin, push it upward with both hands, and then pull it away from the door. To reinstall the bin, align it with the marked line and press it back into place.

Once the door bins have been removed, open the crisper drawer fully. Gently lift the front of the drawer, and then pull it straight out. To reinstall the drawer, place it onto the frame rails and slide it all the way back into the refrigerator.
Depending on your refrigerator model, the glass shelf above the crisper drawers can be removed for easier cleaning. Some models have a simple shelf that lifts out, while others use a shelf assembly that requires a few additional steps.
Caution: Handle the glass shelf carefully. Broken glass can cause injury. Never clean the glass shelf with warm or hot water, as sudden temperature changes may cause it to shatter. Allow the glass to reach room temperature before cleaning it with lukewarm water.
If your refrigerator has a simple shelf design, fully open both doors and remove the crisper drawers. Lift one side of the glass shelf while supporting it with your other hand, and then carefully slide the shelf out.
Some refrigerator models use a shelf assembly that locks into place above the crisper drawers. To remove this type of shelf, follow these steps:


Note: The tabs may have a slightly different appearance depending on the refrigerator model, but they will be in the same general location.


Note: Some refrigerator models do not have removable retainer clips. On these models, the glass cannot be separated from the plastic frame. If food debris becomes trapped between the glass and frame, soak the entire shelf in a water and bleach solution. If it still cannot be cleaned, the shelf will need to be replaced. Do not attempt to separate the glass, as doing so may damage the shelf.


Thank you for your feedback!
Please answer all questions.
RC01_Static Content : Hide call number function